


Simple, regular DIY furnace care keeps your heater safe, efficient and dependable — and it stops small problems from becoming big, expensive repairs. This guide walks you through the hands-on tasks homeowners and small-business operators can do: choosing and replacing the right filter, cleaning the blower, and keeping the flame sensor and condensate lines clear. You’ll also find a consolidated checklist, tool lists, decision points for tougher issues, and short tables to help plan seasonal maintenance for Saskatoon’s cold months. When a job goes beyond safe DIY limits, the guide tells you exactly when to call a pro.
How Often Should You Replace Your Furnace Air Filter for Best Performance?
A clean air filter protects airflow, the blower motor, and indoor air quality. When filters clog, the blower strains, energy use climbs and components wear faster; swapping filters restores proper airflow and heat transfer. How often you change filters depends on filter type and MERV rating, household factors (pets, allergies), and seasonal demand — winter use usually needs closer attention. Below are quick checks and a comparison of common filter types to help you pick the right filter and schedule replacements practically.
Visually inspect your filter regularly: hold it up to a light — if most light doesn’t pass through, replace it. That quick check flags when you need to change more often during heavy-use periods. The next section compares filter types and MERV guidance so you can choose what suits your system and indoor-air needs.
What Types of Furnace Filters Work Best for Your Home or Business?
Filters trade cost, particle capture and airflow restriction. Fiberglass filters are cheap but capture fewer fine particles; pleated filters offer a good balance; and HEPA-compatible or high-MERV options catch smaller particles but can increase airflow resistance. For homes with pets or allergy sufferers, a pleated filter in the MERV 8–11 range usually gives good filtration without overloading residential blowers. Commercial systems sometimes accept higher MERV ratings if built for them. Always consider your furnace’s AFUE and blower capacity before choosing high-MERV filters — too much restriction hurts performance. Pick the filter that matches your indoor-air priorities and system tolerance for Saskatoon winters.
The table below summarizes typical MERV ranges and replacement cadence so you can match filter type to use case and local conditions.
Different filters suit different needs; this quick reference shows MERV guidance and suggested replacement intervals.
Use this comparison to match filter performance with occupant needs and furnace limits — the right choice keeps your system running efficiently and reduces risk of performance loss.
How to Replace Your Furnace Air Filter — Step by Step
Start by turning off power to the furnace and locating the filter slot (usually in the return-air duct or blower compartment). Remove the old filter slowly to avoid spreading dust, check it for debris or discoloration, and note size and airflow arrow so you install the new one correctly. Slide in the new filter with the arrow pointing toward the furnace, secure the access panel and mark the replacement date so you build a routine. If the new filter fits poorly or noticeably restricts airflow, recheck the size and MERV rating and follow the checklist for next steps.
How Can You Clean Your Furnace Blower to Boost Efficiency and Lifespan?
Cleaning the blower restores airflow and reduces wear by removing dust that can unbalance the fan and load the motor. A dusty blower runs noisier, uses more energy and risks overheating. Always cut power and follow safety steps before removing panels. Below you’ll find the basic tools, PPE and common symptoms to help you decide whether cleaning, lubrication or a technician is needed.
Gather the right tools and take safety precautions — that protects you and the equipment. After cleaning, run the blower and listen for odd noises that suggest deeper problems.
Basic tools and PPE for blower cleaning:
- Screwdrivers and nut drivers: Remove access panels and mounting fasteners.
- Shop vacuum with soft brush attachment: Remove dust without scratching surfaces.
- Soft brush and rags: Gently dislodge stubborn debris.
- Multimeter: Verify power is off before you work.
- Safety glasses and dust mask: Protect eyes and lungs during cleaning.
With these items on hand you can clean effectively and safely; after reassembly, test the blower and watch for vibrations, rattles or abnormal sounds that indicate further issues.
What Tools and Safety Steps Do You Need to Clean the Blower Motor?
Essential items include screwdrivers, a shop vacuum with a brush attachment, a soft detailing brush and a multimeter to confirm power isolation. Wear safety glasses and a dust mask. Always shut the furnace off at the switch and flip the breaker, then verify there’s no voltage at accessible terminals before opening panels — lockout/tagout if possible. Work in good light, avoid touching wiring or capacitor terminals, and stop if you find corrosion, damaged wiring or seized bearings. When in doubt, contact a professional to avoid injury or further damage.
How Can You Tell If Your Furnace Blower Is Dirty or Failing?
Signs of a dirty or failing blower include reduced airflow, higher energy bills, unusual vibrations or squealing bearings. You can do simple checks at vents and compare energy use month to month after cleaning. If airflow stays low despite a clean filter, the blower may be unbalanced or the motor losing torque. Scraping, grinding or other mechanical noises usually mean a component needs repair or replacement — cleaning alone won’t fix it. If cleaning doesn’t restore quiet, steady airflow, schedule professional diagnostics to prevent bigger failures.
How Do You Inspect and Clean the Flame Sensor to Ensure Safe Ignition?
The flame sensor is a thin metal rod that confirms the burners are lit. When it’s fouled with soot or corrosion the control board can shut the gas off to prevent unburned gas — causing lockouts and interruptions. Cleaning the sensor restores reliable ignition and consistent operation. Always de-energize the furnace and let components cool before you access the burner compartment. The steps below explain why this part matters for safety and how to clean it carefully.
Knowing how the sensor prevents gas buildup and false starts explains why you should include it in seasonal checks.
Why Is Flame Sensor Care Important for Safe Furnace Operation?
Keeping the flame sensor clean ensures the control board gets a valid flame signal so the gas valve only stays open when combustion is confirmed. A dirty or corroded sensor can cause repeated shutdowns, extra cycling and premature wear — all of which reduce comfort and shorten component life. A clean sensor also supports consistent flame behavior, which helps combustion efficiency and lowers emissions. Make flame sensor checks part of your seasonal routine and use them as a diagnostic step before assuming a more serious ignition fault.
Cleaning the sensor is a precise task; the next section gives step-by-step instructions and troubleshooting if lockouts continue.
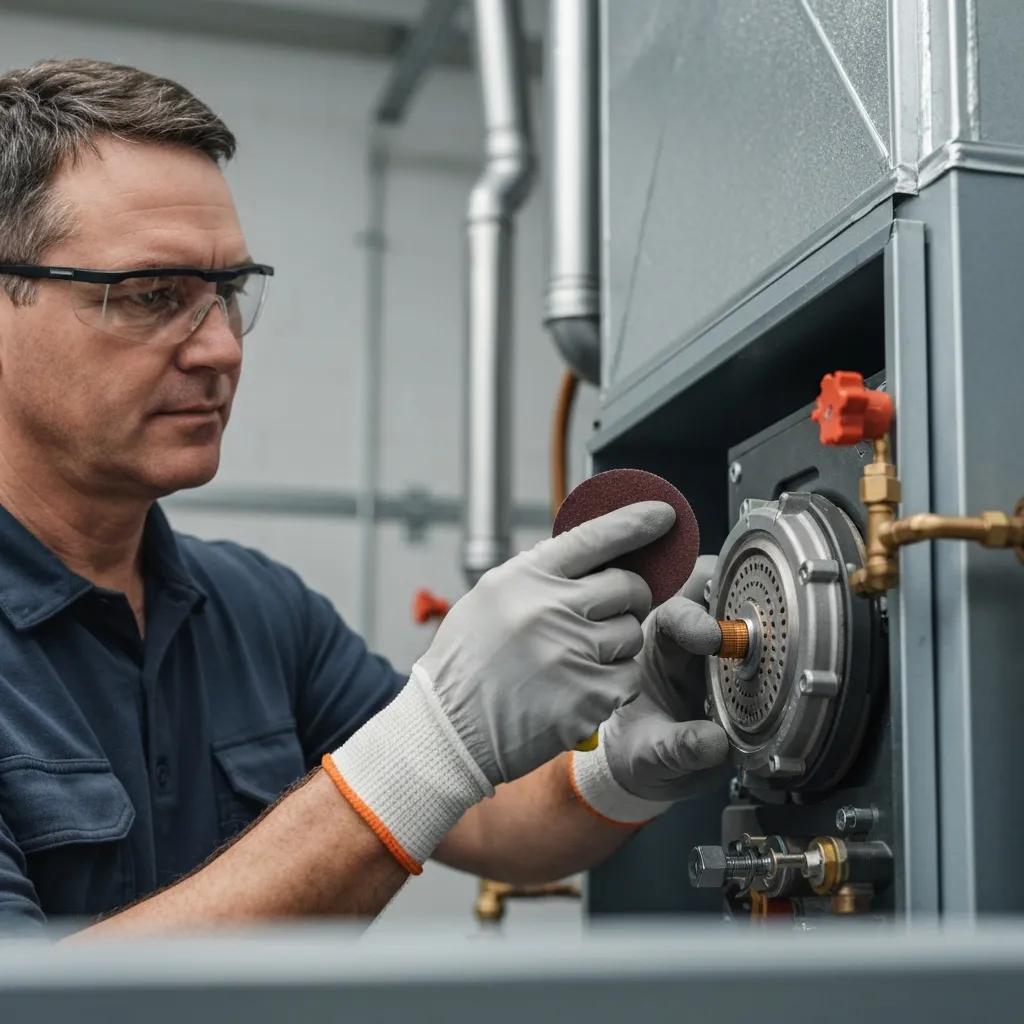
How to Clean and Troubleshoot the Flame Sensor — Step by Step
After cutting power and allowing the furnace to cool, open the burner compartment and locate the flame sensor (a thin probe near the burners). Remove the mounting screw and slide the sensor out gently. Clean the tip with a fine abrasive pad or emery cloth using light strokes — don’t reshape the probe — then wipe it dry and reinstall in the same orientation. Restore power and watch a few ignition cycles. If lockouts persist, check sensor continuity and the flame signal with a multimeter and review control-board error codes. If cleaning and basic electrical checks don’t fix the issue, book professional diagnostics to avoid extended combustion problems.
What Should Be on Your Complete DIY Furnace Maintenance Checklist?
A practical checklist groups routine tasks by frequency (monthly, seasonally, annually) to keep your system safe and efficient. Include filter changes, blower checks, burner inspections, thermostat calibration and condensate-line care. A structured checklist reduces emergency calls and helps you spot warning signs early. Below is a decision-oriented table summarizing tasks, tools, time estimates and when to call a technician.
Use this quick matrix to plan maintenance sessions, prioritize work before winter and know when to book a professional tune-up.
This table helps you schedule tasks efficiently and shows when professional service is the safer, more effective choice.
How to Check and Calibrate Your Thermostat for Accurate Temperature Control
Thermostat calibration makes sure the set temperature matches actual room conditions so the furnace cycles properly. An inaccurate thermostat causes short-cycling or long runtimes that waste energy and increase wear. Place a reliable thermometer next to the thermostat, compare readings to the setpoint, and adjust the thermostat’s offset or follow the manufacturer’s recalibration steps. For mechanical units, adjust the calibration screw gently; for smart thermostats check software, schedules and connectivity, and reboot if needed. If recalibration doesn’t fix control or zoning problems, call a technician to inspect wiring or controls.
Accurate thermostat control reduces unnecessary heating cycles and sets you up for cleaner burner operation.
How to Inspect and Clean Burners and Pilot Lights for Proper Combustion
Burners should show steady, mostly blue flames. Yellow tips or heavy soot mean incomplete combustion or air-fuel imbalance — a safety and efficiency concern. With power off and burners cool, use a soft brush or compressed air to clear dust and spider webs from burner ports without enlarging them; reassemble and observe the flame pattern on restart. Standing pilots and pilots must burn blue and steady; persistent yellowing or sooting needs professional combustion analysis and possible gas-pressure or burner adjustments. If cleaning doesn’t fix flame color or sooting, schedule a pro to inspect the heat exchanger and combustion settings.
At the end of a DIY session, consider professional tuning. Efficiency Heating & Cooling offers scheduled maintenance plans for Saskatoon homeowners that pair well with regular DIY tasks to extend equipment life and reduce surprises during peak demand.
Frequently Asked Questions
1. What are the benefits of regular DIY furnace maintenance?
Regular DIY maintenance improves energy efficiency, supports better indoor air quality and helps equipment last longer. Tasks like changing filters, cleaning the blower and checking the flame sensor prevent many common failures and let you spot issues early — saving money and reducing the chance of emergency service calls during peak winter demand.
2. How can I tell if my furnace needs professional servicing?
Look for unusual noises, persistent odors, uneven heating or frequent on/off cycling. A sudden jump in energy bills without increased use or failure to hold set temperature are signs something’s wrong. If your carbon monoxide detector sounds or you smell gas, evacuate and call a professional immediately for safety.
3. What should I do if my furnace is blowing cold air?
First check thermostat settings — make sure it’s set to “heat” and the desired temperature is above room temperature. Inspect the filter (a clogged filter can cause airflow problems). If the filter is clean and the furnace repair service still blows cold air, the issue may be the blower motor, ignition system or gas supply and will likely need professional diagnosis.
4. How can sealing air ducts improve furnace efficiency?
Sealing ducts reduces heat loss during distribution so more warm air reaches living spaces, lowering energy use and bills. Using mastic or foil-backed HVAC tape on seams and joints improves airflow and temperature consistency. Depending on how leaky the system is, sealing can yield efficiency gains of roughly 5–20%.
5. What are common mistakes to avoid during DIY furnace maintenance?
Don’t skip safety checks: always turn power off before working. Avoid using the wrong tools or incorrect replacement parts. Don’t use household duct tape on ducts, and don’t overtighten or force components. If you’re unsure, stop and call a professional — it’s cheaper and safer than fixing a DIY mistake.
Conclusion
Regular DIY furnace maintenance keeps your system running efficiently, extends equipment life and helps you avoid cold surprises. Follow the practical steps in this guide, keep records of what you do, and call a pro when work involves combustion, heat-exchanger or electrical risks. Start with simple tasks today — and consider a professional maintenance plan for peace of mind through Saskatoon’s heating season.


Customer Testimonials
Hear what our satisfied customers have to say about their experiences with us.
I had my furnace decided to act up in the evening, of course. They sent out a tech that night and he was able to get to going till a new part could be installed the next day. The next time I need any work done, or service, this is who I am calling! Thanks again.
Dustin was excellent. Quickly diagnosed and corrected the problem I had with my furnace. Proactive and efficient worker with excellent communication. Took the time to see if I had any other questions or concerns. Highly recommend!!
I just had Dustin here to do a maintenance on air conditioner. He was so awesome and knowledgeable. I would absolutely recommend these guys to anyone. They also did my maintenance on furnace a year ago and was very good and professional at it. High recommend 5 star.
Great Job! Very pleased with the installation of our A/C unit. Installers were very professional - arrived on time, work area was cleaned up when they were finished, explained what they had done and ensured that we understood how the installation worked before they left.
Overall very good service, both after hours and during regular hours. Managed to schedule me in promptly to have my furnace replaced. The technicians mislabeled the zones on the thermostat, however overall very happy with the install. Will definitely be a returning customer.
they were sent on behalf of North Prairie Rentals. I was kept up to date and the gentleman that came was knowledgeable and friendly.
Had my water heater replaced. Carter had only been with the company for 6 months but proved to be very thorough and careful. He checked for gas leaks several times, readily replaced old parts and explained lighting procedure. I was very pleased with his workmanship.
Started with a furnace checkup which quickly turned into a discussion about a new furnace. Received an honest explanation of problems and reasons for purchasing a new furnace rather than fixing old one. Fast efficient service upon installation. Very happy with customer service!
My husband and I had Jason from Efficiency come out to fix a couple of gas leaks. We were very happy with the work he did. He was knowledgeable and took the time to answer all of our questions. We highly recommend! We will definitely be booking with Efficiency for our future needs due to Jason’s outstanding customer service!
We had a furnace installed recently. The guys at EH&C did a super job. They described how the install would go, answered all our questions, proceeded quickly and efficiently. Very pleased.